When you're building an Arduino, ESP8266, ESP32, or other electronics project, measuring the surrounding temperature and humidity is one of the easiest ways to get started with real-world sensor data.
The DHT11 Temperature and Humidity Sensor Module with LED Indicator is a popular choice for beginners because it combines temperature and humidity sensing in a small, easy-to-use module. With a simple digital interface, it can be connected to common development boards without requiring complicated wiring.
Whether you're making a home weather station, room monitor, smart fan, greenhouse project, or basic IoT device, the DHT11 can provide the environmental data your project needs.
In this guide, we'll cover what the DHT11 sensor module is, how it works, its key specifications, wiring, common applications, and how beginners can use it in Arduino and IoT projects.
What Is a DHT11 Temperature and Humidity Sensor?
The DHT11 is a digital sensor designed to measure both temperature and relative humidity.
Instead of requiring separate temperature and humidity sensors, the DHT11 combines both measurements into one component.
The sensor sends its readings digitally to a microcontroller, making it relatively straightforward to use with development boards such as:
- Arduino Uno
- Arduino Nano
- ESP8266
- ESP32
- Raspberry Pi and compatible interfaces
- Other microcontroller platforms
The DHT11 is particularly popular in educational electronics because it provides an easy introduction to reading sensor data.
What Is the LED Indicator for?
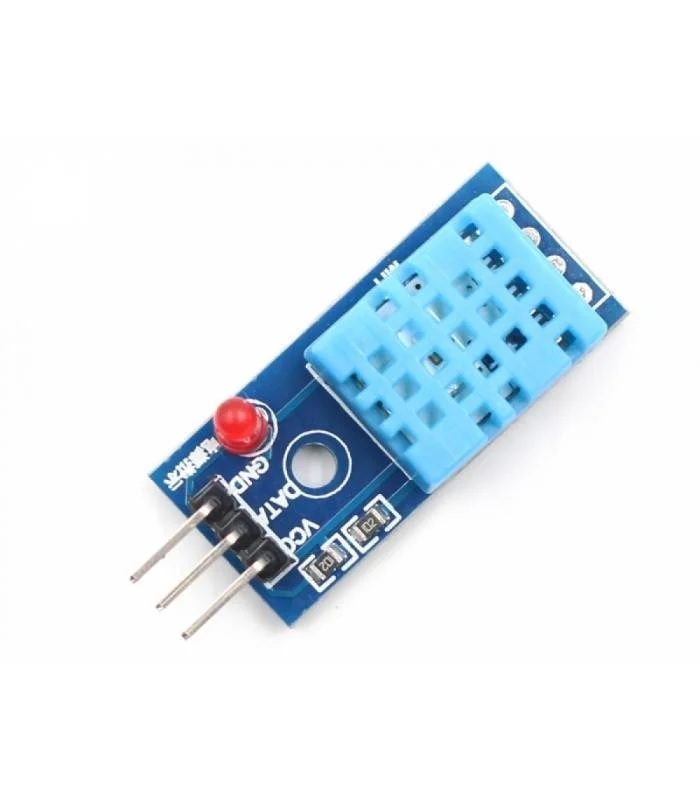
The module version of the DHT11 commonly includes an LED indicator.
The LED is useful for quickly checking the module's status during operation. Depending on the specific module design, the indicator may illuminate when the sensor is powered or operating.
It's worth noting that the LED is a feature of the module board, not the sensing element itself. Different manufacturers may use slightly different module layouts, so the exact LED behavior can vary.
This is one reason checking the product description and module pinout before installation is a good idea.
Key Features of the DHT11 Sensor Module
The exact specifications can vary slightly depending on the manufacturer and module version, but the DHT11 generally offers the following characteristics.
Temperature Measurement
The DHT11 can measure temperature over a relatively limited range compared with more advanced digital sensors.
It is designed primarily for basic environmental monitoring rather than precision industrial measurement.
Humidity Measurement
The sensor measures relative humidity and provides the result digitally.
This makes it useful for projects where you want to monitor conditions in a room, storage area, greenhouse, or similar environment.
Digital Output
One of the biggest advantages for beginners is that the DHT11 provides digital data.
You don't have to manually convert an analog voltage into temperature and humidity values. Your microcontroller communicates with the sensor and receives the readings.
Simple Interface
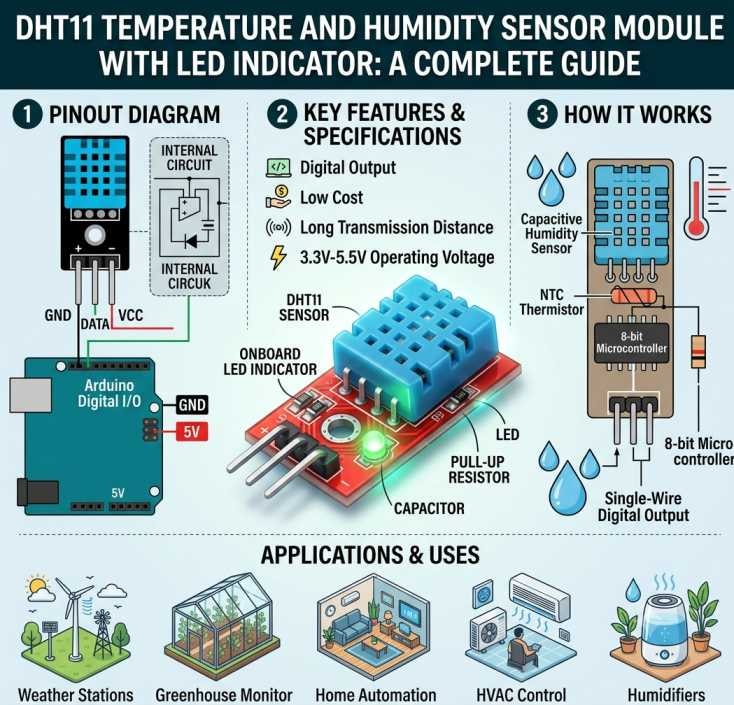
The typical DHT11 module exposes a small number of pins, commonly:
VCC → Power
GND → Ground
DATA → Sensor data
Some modules may have additional pins or different labeling, so always verify the actual board you're using.
Compact Size
The sensor takes up very little space, making it suitable for breadboard prototypes and compact DIY projects.
DHT11 Sensor Specifications
Typical DHT11 specifications are approximately:
Feature | Typical DHT11 Specification |
|---|---|
Temperature Range | 0°C to 50°C |
Temperature Accuracy | Around ±2°C |
Humidity Range | 20% to 80% RH |
Humidity Accuracy | Around ±5% RH |
Output | Digital |
Interface | Single-wire digital communication |
Supply Voltage | Commonly 3.3V–5V depending on implementation/module |
Sensor Type | Temperature + Humidity |
These values are representative of the standard DHT11 sensor family. Always refer to the specific manufacturer's datasheet when accuracy or electrical specifications are critical.
The DHT11 isn't intended to compete with higher-end environmental sensors. Its main advantage is that it's simple, affordable, and easy to experiment with.
How Does the DHT11 Work?
The DHT11 contains sensing elements for measuring temperature and humidity along with signal-processing electronics.
When the microcontroller requests a reading, the sensor processes the measurements and sends the data through its digital communication line.
The microcontroller then interprets the received data and converts it into values you can display or use in your program.
For example:
DHT11 → Temperature: 28°C
DHT11 → Humidity: 64%
Your project can then use those values to trigger another action.
For example:
If temperature exceeds 30°C → Turn on fan.
Or:
If humidity falls below a certain level → Activate a humidifier.
This simple sensor-to-action relationship is the foundation of many beginner IoT projects.
DHT11 Pin Configuration
A typical DHT11 module has three main connections.
VCC
Connect this pin to the appropriate power supply.
GND
Connect it to the ground of your microcontroller.
DATA
The data pin is connected to a digital GPIO pin on your Arduino, ESP8266, ESP32, or other compatible controller.
A basic connection might look like:
DHT11 VCC → Arduino 5V
DHT11 GND → Arduino GND
DHT11 DATA → Arduino Digital Pin
However, the correct supply voltage and wiring depend on the specific module and controller you're using. For ESP8266 and ESP32 projects in particular, make sure the signal levels and module requirements are appropriate.
How to Use DHT11 with Arduino
One of the most common beginner projects is connecting the DHT11 to an Arduino Uno.
The general process is straightforward.
Step 1: Connect the Sensor
Connect the DHT11 module's power, ground, and data connections to the Arduino.
Step 2: Install the Required Library
Libraries make it easier to communicate with the sensor from your Arduino program.
The DHT sensor library from Adafruit is one commonly used option for DHT-family sensors.
Step 3: Write Your Program
The program tells the Arduino to request temperature and humidity measurements from the sensor.
Step 4: Display the Results
The readings can be displayed through the Serial Monitor, an LCD, OLED screen, web interface, or another output device.
For a beginner, displaying the results in the Arduino Serial Monitor is a good place to start.
Example Arduino Code
Here is a simple example using a DHT11 and an Arduino-compatible environment:
#include <DHT.h>
#define DHTPIN 2
#define DHTTYPE DHT11
DHT dht(DHTPIN, DHTTYPE);
void setup() {
Serial.begin(9600);
dht.begin();
}
void loop() {
delay(2000);
float humidity = dht.readHumidity();
float temperature = dht.readTemperature();
if (isnan(humidity) || isnan(temperature)) {
Serial.println("Failed to read from DHT11 sensor");
return;
}
Serial.print("Temperature: ");
Serial.print(temperature);
Serial.println(" °C");
Serial.print("Humidity: ");
Serial.print(humidity);
Serial.println(" %");
}
The DHTPIN value should match the digital pin you actually connect the sensor's data line to.
The delay between readings is intentional because the DHT11 is a relatively slow sensor and should not be polled continuously at very high frequency.
DHT11 with ESP8266
The DHT11 can also be used with popular Wi-Fi boards such as the NodeMCU ESP8266.
This opens up a much larger range of applications.
For example:
DHT11 → ESP8266 → Wi-Fi → Web Dashboard
Now the temperature and humidity information doesn't have to stay on your desk.
You could create a webpage that displays:
Temperature: 27°C
Humidity: 61%
You could also send the readings to an IoT platform or database for monitoring and analysis.
This combination makes the DHT11 a useful component for beginner IoT projects.
DHT11 with ESP32
The same basic concept can be used with an ESP32.
The ESP32 gives you more processing capability and connectivity options, so you can build more advanced projects around the sensor.
For example, an ESP32 and DHT11 could be used to create:
- A Wi-Fi weather monitor
- Room environment monitoring
- Smart ventilation
- Greenhouse monitoring
- Temperature alerts
- IoT dashboards
The actual wiring must take the ESP32's 3.3V logic levels into account, so check the electrical characteristics of the particular DHT11 module you're using.
Projects You Can Build with DHT11
The best way to learn a sensor is to build something with it.
Here are several useful DHT11 project ideas.
1. Digital Temperature and Humidity Monitor
Connect the DHT11 to an Arduino and OLED display.
Your display could show:
Temperature: 29°C
Humidity: 58%
This is an excellent beginner project because it lets you see the sensor readings immediately.
2. Automatic Fan Controller
Use the DHT11 to monitor room temperature.
When the temperature reaches a predefined threshold, the controller can activate a fan through an appropriate transistor, MOSFET, or relay circuit.
For example:
Temperature < 30°C → Fan OFF
Temperature ≥ 30°C → Fan ON
This introduces beginners to sensor-based automation.
3. Smart Greenhouse Monitor
Temperature and humidity are important environmental parameters in many greenhouse applications.
The DHT11 can be used as part of a basic monitoring system that reports conditions and triggers other devices.
A more advanced setup could combine it with:
- Soil moisture sensors
- Water pumps
- Light sensors
- Relays
- Displays
- Wi-Fi connectivity
4. IoT Weather Station
Combine the DHT11 with an ESP8266 or ESP32 and send measurements over Wi-Fi.
You could create an online dashboard showing:
Temperature
Humidity
Historical readings
Time of measurement
This is a practical introduction to IoT data collection.
5. Room Environment Monitor
A small DHT11-based device can monitor the conditions inside a room.
The sensor can periodically collect measurements while a microcontroller stores or displays the information.
For students, this is a simple project that combines hardware, programming, and data visualization.
Advantages of DHT11
The DHT11 remains popular because of its simplicity.
Affordable
The sensor is inexpensive, making it accessible for students and hobbyists who are experimenting with electronics.
Easy to Use
The digital interface makes it relatively simple to connect to common microcontroller boards.
Two Measurements in One Sensor
You get temperature and humidity measurements without needing two separate sensors.
Large Maker Community
Because the DHT11 has been used in countless tutorials and hobby projects, beginners can find plenty of examples and learning resources.
Great for Basic Projects
For simple monitoring and educational projects, the DHT11 can be more than enough.
Limitations of the DHT11
It's also important to understand where the DHT11 isn't the right choice.
The sensor has a relatively narrow measurement range and modest accuracy compared with newer sensors.
It is also comparatively slow.
For applications requiring:
- Higher accuracy
- Faster sampling
- Wider temperature ranges
- More precise humidity measurements
- Professional environmental monitoring
you may want to consider a more advanced sensor.
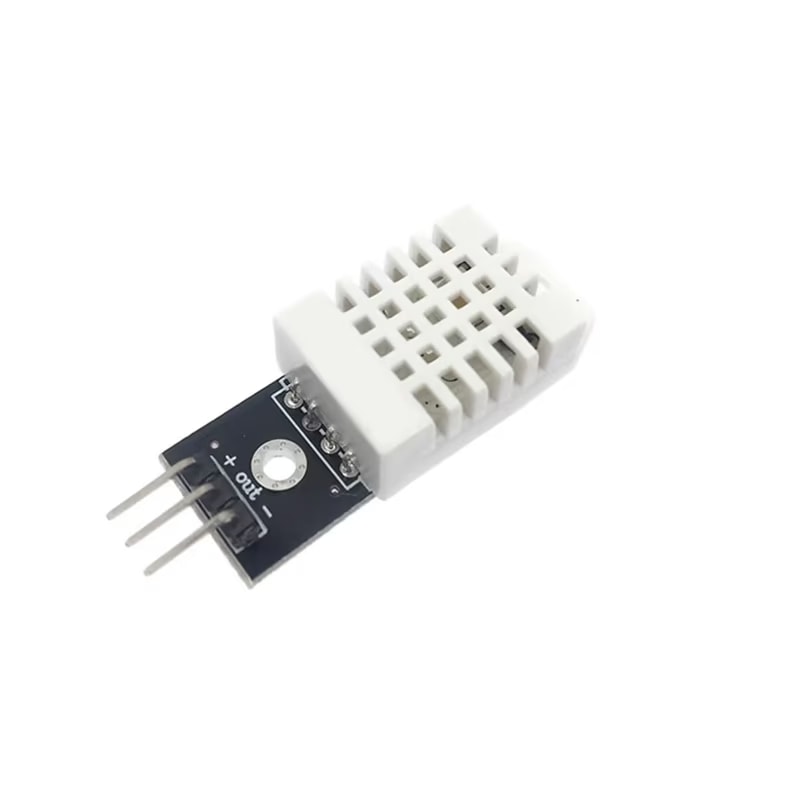
Sensors such as the DHT22/AM2302 or newer digital temperature-and-humidity sensors can offer better performance depending on the application.
The DHT11 makes the most sense when simplicity and cost are more important than precision.
DHT11 vs DHT22
The DHT22 is often considered an upgrade from the DHT11.
Feature | DHT11 | DHT22 |
|---|---|---|
Temperature Range | More limited | Wider |
Temperature Accuracy | Lower | Higher |
Humidity Range | More limited | Wider |
Humidity Accuracy | Lower | Higher |
Sampling Speed | Slower | Better |
Cost | Usually lower | Usually higher |
Beginner Projects | Excellent | Excellent |
For basic school projects or simple room monitoring, DHT11 is often sufficient.
For projects where more precise environmental data matters, DHT22 may be the better option.
Tips for Getting Reliable DHT11 Readings
Even though the DHT11 is simple to use, a few practices can make your project more reliable.
Don't Read the Sensor Too Frequently
The DHT11 isn't designed for rapid continuous measurements. Give the sensor enough time between readings.
Check Your Wiring
Many problems that look like software bugs are simply incorrect VCC, GND, or DATA connections.
Use the Correct Library
Make sure your software is configured for the correct sensor type.
For example:
#define DHTTYPE DHT11
Avoid Extreme Conditions
The DHT11 is designed for basic environmental monitoring, not harsh industrial environments.
Verify the Module Pinout
Different manufacturers can use different board layouts or labeling. Check the actual product before connecting power.
Is the DHT11 Good for Beginners?
Absolutely.
In fact, the DHT11 is one of the more approachable sensors for someone learning Arduino and IoT.
It teaches several important concepts at once:
Digital sensors
GPIO communication
Libraries
Reading real-world data
Conditional logic
Automation
Once you've successfully read temperature and humidity from a DHT11, you can use the same general approach with many other sensors.
Where Can You Buy a DHT11 Temperature and Humidity Sensor Module?
For hobby electronics and DIY projects, having the right sensor is just as important as choosing the right development board.
You can explore the DHT11 Temperature and Humidity Sensor Module with LED Indicator on Component Wala and find other components you may need for your Arduino, ESP8266, ESP32, and IoT projects.
Whether you're building your first temperature monitor or experimenting with a connected smart-home project, the DHT11 is an inexpensive component to keep in your electronics kit.
Final Thoughts
The DHT11 Temperature and Humidity Sensor Module with LED Indicator is a simple sensor, but it can be the starting point for a wide range of electronics and IoT projects.
Its ability to measure both temperature and humidity through a digital interface makes it particularly convenient for beginners. Connect it to an Arduino and you can create a basic environmental monitor. Connect it to an ESP8266 or ESP32 and you can take the same idea online.
The important thing is to understand what the DHT11 is designed for.
It isn't a precision laboratory sensor, and it shouldn't be treated like one. But for learning, prototyping, basic monitoring, and DIY automation, it offers a straightforward way to start working with real-world environmental data.
Start with a sensor, write a little code, and build something useful. That's where the fun of electronics begins.
Frequently Asked Questions
What does a DHT11 sensor measure?
The DHT11 measures temperature and relative humidity.
Does the DHT11 have a digital output?
Yes. The DHT11 communicates its measurements digitally with a compatible microcontroller.
Can I use DHT11 with Arduino?
Yes. DHT11 is commonly used with Arduino boards and can be read using compatible sensor libraries.
Can DHT11 work with ESP8266?
Yes. DHT11 can be connected to ESP8266 development boards for Wi-Fi-enabled temperature and humidity monitoring projects.
What is the LED on the DHT11 module for?
The LED is an indicator on many DHT11 module boards. Its exact behavior depends on the module design and manufacturer, but it commonly provides a visual indication related to power or operation.
Is DHT11 better than DHT22?
Not generally. DHT22 offers a wider measurement range and better accuracy, while DHT11 is usually cheaper and perfectly adequate for many beginner projects.
Where can I use a DHT11 sensor?
DHT11 can be used in room monitors, basic weather stations, greenhouse projects, smart-home experiments, IoT systems, fan controllers, and educational electronics projects.
Related products
Components that pair well with this guide.