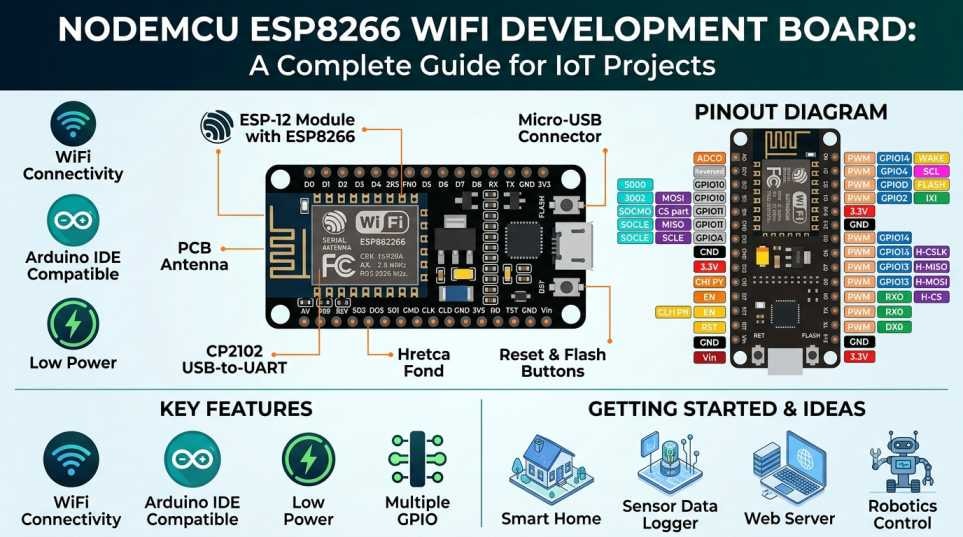
If you're getting started with IoT, home automation, or Wi-Fi-enabled electronics, you don't always need an expensive development board.
Sometimes, a small board with built-in Wi-Fi, a handful of GPIO pins, and an easy programming setup is all you need to turn an idea into a working project. That's where the NodeMCU ESP8266 WiFi Development Board comes in.
The ESP8266 has been popular among makers for years because it combines a microcontroller with Wi-Fi connectivity in a compact and affordable platform. It can connect sensors to the internet, control devices remotely, host simple web interfaces, and communicate with online services.
In this guide, we'll look at what a NodeMCU ESP8266 board is, its important features, what you can build with it, how it compares with Arduino and ESP32, and how beginners can get started.
What Is a NodeMCU ESP8266 WiFi Development Board?
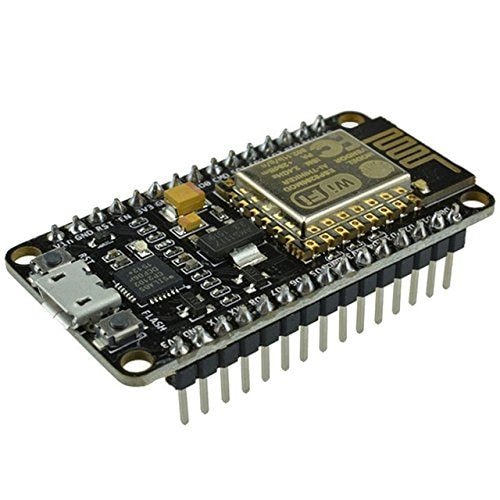
The NodeMCU ESP8266 WiFi Development Board is a development board based on the ESP8266 Wi-Fi SoC from Espressif.
Unlike a traditional Arduino Uno, which requires an additional module for Wi-Fi, the ESP8266 has Wi-Fi built directly into the chip. The ESP8266EX supports 2.4 GHz 802.11 b/g/n Wi-Fi and can operate as a Wi-Fi station, access point, or both.
A typical NodeMCU board adds the things that make working with the ESP8266 easier, such as a USB connection for programming, a USB-to-serial interface, power regulation, and accessible pins.
This makes it a convenient choice for:
- IoT projects
- Smart home systems
- Sensor monitoring
- Wi-Fi automation
- Remote device control
- DIY electronics
- Robotics
- Internet-connected prototypes
The real attraction is simple: you get a programmable microcontroller and Wi-Fi connectivity on one small board.
Why Is the ESP8266 Still Popular?
The ESP8266 isn't the newest Wi-Fi microcontroller on the market. The ESP32 is more powerful and adds features such as Bluetooth.
So why do people still use the ESP8266?
Because many projects simply don't need all that extra power.
Suppose you want to build a temperature monitor that sends readings to a web server every few minutes. Or you want to switch a relay from your phone. Or you want to make a small Wi-Fi-controlled robot.
For projects like these, an ESP8266 can be more than capable.
It's inexpensive, compact, has a large maker community, and works with widely used development environments such as the Arduino ecosystem.
Key Features of the NodeMCU ESP8266
The exact specifications can vary between NodeMCU board versions and manufacturers, so it's worth checking the product documentation for the particular board you're purchasing.
At the ESP8266 chip level, the platform includes several features that make it well suited to connected electronics.
Built-In 2.4 GHz Wi-Fi
The biggest reason to choose ESP8266 is Wi-Fi.
The ESP8266EX supports IEEE 802.11 b/g/n networking in the 2.4 GHz range, with Station and SoftAP modes available.
That means your project can connect to an existing wireless network or, depending on the application, create its own access point.
32-Bit Processor
The ESP8266 uses a Tensilica L106 32-bit processor.
For many sensor, automation, and networking projects, this provides plenty of processing capability.
GPIO Pins
The development board exposes multiple GPIO pins that can be used to connect components such as:
- LEDs
- Push buttons
- Temperature sensors
- Humidity sensors
- PIR sensors
- Relays
- Displays
- Motors and motor controllers
The ESP8266's peripheral capabilities include GPIO, PWM, ADC, SPI, I2C, UART, and other interfaces.
USB Programming
Most NodeMCU development boards are designed to make programming straightforward through USB.
You can connect the board to your computer, select the appropriate board in your development environment, and upload your program without needing a separate programmer.
Compact Development Platform
One reason NodeMCU boards are so popular with hobbyists is their practical form factor. They can be used with breadboards and jumper wires while still being small enough to fit inside many prototype enclosures.
What Can You Build With a NodeMCU ESP8266?
This is where the board becomes interesting.
The ESP8266 isn't just something you use to learn Wi-Fi programming. It can become the brain of a complete connected project.
1. Smart Home Automation
Use the ESP8266 to control lights, fans, appliances, or other devices over Wi-Fi.
For example, you could build a system where your phone sends a command to the ESP8266, and the board activates a relay connected to a lamp.
You could also combine it with sensors to make automation conditional.
For example:
Motion detected → ESP8266 processes the signal → light turns on.
That's a simple idea, but it can become the foundation for much larger home automation projects.
2. IoT Temperature Monitoring
Connect a temperature and humidity sensor to the ESP8266 and send measurements to an online dashboard.
You could monitor:
- Room temperature
- Humidity
- Greenhouse conditions
- Server-room temperatures
- Weather data
- Storage environments
Since the board has built-in networking, you don't need a separate Wi-Fi module just to send the readings online.
3. Wi-Fi Controlled Robot
The ESP8266 can also be used in robotics projects.
A simple Wi-Fi robot might contain:
ESP8266 + Motor Driver + Motors + Battery + Wi-Fi Controller
A phone or web interface could send commands to move the robot forward, backward, left, or right.
For simple connected robotics projects, this can be a fun way to learn both electronics and programming.
4. Web Server Projects
One particularly interesting feature of the ESP8266 is that it can communicate over HTTP and can be used in projects that provide a web interface. The ESP8266 platform supports networking protocols including IPv4, TCP, UDP, and HTTP.
For example, the ESP8266 could host a simple webpage containing buttons:
LIGHT ON
LIGHT OFF
FAN ON
FAN OFF
Opening the page from a phone connected to the same network could allow you to control your hardware.
It's a great beginner project because you get to combine:
HTML + programming + networking + electronics
in one build.
NodeMCU ESP8266 vs Arduino Uno
This is one of the first comparisons beginners usually make.
Arduino Uno is excellent for learning basic electronics and microcontroller programming. But the standard Uno doesn't have built-in Wi-Fi.
The ESP8266 changes that equation.
Feature | Arduino Uno | NodeMCU ESP8266 |
|---|---|---|
Built-in Wi-Fi | No | Yes |
IoT projects | Requires additional hardware for Wi-Fi | Excellent |
GPIO | Good for basic projects | Suitable for many connected projects |
Internet connectivity | External module required | Built in |
Beginner friendly | Yes | Yes |
Typical use | Learning, electronics, robotics | IoT, Wi-Fi automation, connected devices |
So the choice depends on the project.
For learning the fundamentals of electronics, an Arduino Uno remains a great option.
For a project where Wi-Fi is central to the idea, an ESP8266 is often the more convenient choice.
NodeMCU ESP8266 vs ESP32
The ESP32 is essentially the bigger and more capable member of the family.
The ESP32 generally offers more processing capability, more peripherals, additional GPIO options, and Bluetooth alongside Wi-Fi.
The ESP8266, on the other hand, is attractive when you want something simpler and inexpensive for a Wi-Fi project.
A useful way to think about it is:
ESP8266 → simple and affordable Wi-Fi projects
ESP32 → more demanding IoT and connected applications
Neither is automatically better for every project.
If you're building a basic Wi-Fi sensor or home automation prototype, the ESP8266 may be all you need.
How to Program the NodeMCU ESP8266
One of the reasons the board is beginner-friendly is the availability of Arduino-compatible development workflows.
A typical beginner setup looks like this:
Step 1: Install Arduino IDE
Download and install the Arduino IDE on your computer.
Step 2: Add ESP8266 Board Support
Add the ESP8266 boards package to your Arduino IDE and select the appropriate NodeMCU/ESP8266 board.
Step 3: Connect the Board
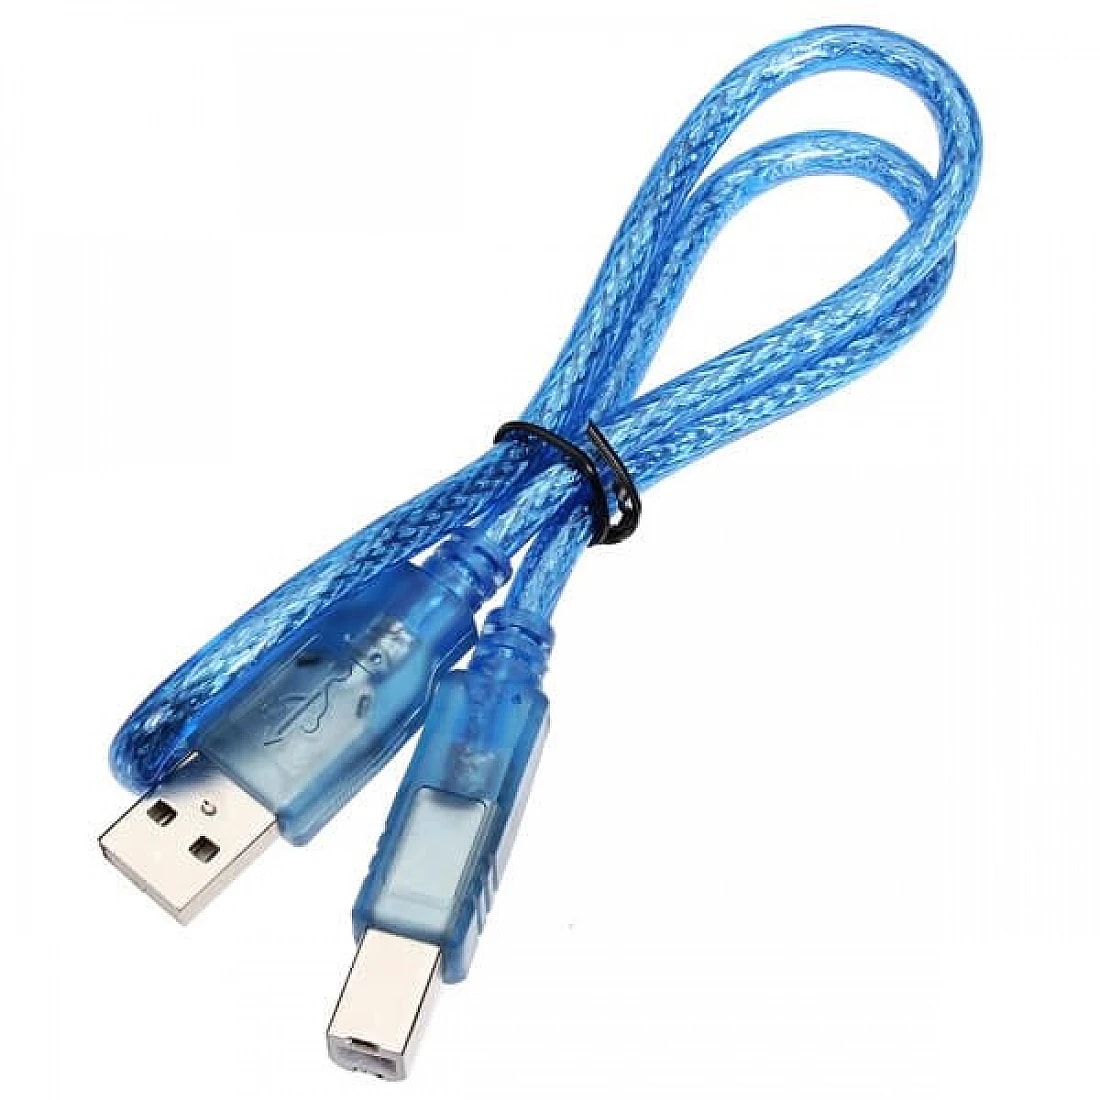
Connect your NodeMCU board to your computer using a suitable USB cable.
Step 4: Upload a Simple Program
Start with something easy, such as blinking an LED.
Once that works, try connecting to Wi-Fi.
Step 5: Build a Real IoT Project
After confirming that Wi-Fi works, connect a sensor or output component and start experimenting.
A natural progression is:
Blink LED → Wi-Fi connection → Read sensor → Send data online → Control hardware remotely
That's enough to take you from your first ESP8266 experiment to a basic IoT system.
Basic Components You May Need
The NodeMCU board is only one part of most projects.
Depending on what you're building, you may also need:
- Breadboard
- Jumper wires
- LEDs and resistors
- Sensors
- Relay modules
- OLED or LCD display
- Motor driver
- DC motors
- Power supply or battery
- USB cable
For beginners, a small collection of sensors and basic components can turn the ESP8266 into a very useful experimentation platform.
Important Things to Know Before Using ESP8266
The ESP8266 operates at low-voltage logic, so don't treat its GPIO pins like a direct interface for arbitrary external voltages.
The ESP8266EX's specified operating voltage is 2.5 V to 3.6 V at the chip level.
That means you should always check the voltage requirements of sensors, modules, relays, and other components before connecting them.
This is especially important when working with:
- 5V devices
- Motors
- Relays
- External power supplies
- Mains electricity
Never connect mains voltage directly to the ESP8266.
For projects involving AC mains, use properly rated isolation, switching hardware, enclosures, and appropriate electrical safety practices.
Is NodeMCU ESP8266 Good for Beginners?
Yes — particularly when the project involves Wi-Fi.
The learning curve can feel slightly different from Arduino because you're dealing with networking in addition to basic electronics. But that's also what makes ESP8266 projects so interesting.
You can start with something as simple as an LED and eventually build:
LED → Wi-Fi LED → Web-controlled LED → Sensor dashboard → Complete IoT automation system
You don't have to understand everything on day one.
Start small and add one feature at a time.
Why Buy a NodeMCU ESP8266 WiFi Development Board?
For students, hobbyists, makers, and developers, the NodeMCU ESP8266 is a practical way to experiment with connected electronics without building a Wi-Fi system from scratch.
It's especially useful when your project needs:
Wi-Fi connectivity + programmable logic + sensor/output control
in a compact development board.
For your next IoT project, you can explore the NodeMCU ESP8266 WiFi Development Board on Component Wala and pair it with the sensors, modules, wires, and other electronics needed to build your prototype.
Final Thoughts
The NodeMCU ESP8266 WiFi Development Board may be a small piece of hardware, but it opens the door to a surprisingly large range of projects.
You can use it to connect sensors to the internet, control devices remotely, create simple web interfaces, experiment with home automation, and learn the fundamentals of IoT development.
And that's probably the biggest reason the ESP8266 has remained popular: it makes connected electronics approachable.
You don't need a complicated development setup to get started. Grab a NodeMCU board, a few basic components, write your first program, and start experimenting.
Your first project might just blink an LED.
Your next one could be connected to the internet.
Ready to start building? Explore NodeMCU ESP8266 and other electronics components at Component Wala.
Frequently Asked Questions
What is a NodeMCU ESP8266 board used for?
NodeMCU ESP8266 boards are commonly used for IoT, Wi-Fi-enabled sensors, home automation, remote control projects, web-server experiments, robotics, and other connected electronics applications.
Does NodeMCU ESP8266 have Wi-Fi?
Yes. The ESP8266EX provides integrated 2.4 GHz IEEE 802.11 b/g/n Wi-Fi functionality.
Can I program NodeMCU ESP8266 with Arduino IDE?
Yes. ESP8266 development boards can be programmed using the Arduino IDE after installing the appropriate ESP8266 board support.
Is ESP8266 better than Arduino Uno?
It depends on your project. Arduino Uno is excellent for basic electronics and learning, while ESP8266 is particularly useful when your project requires built-in Wi-Fi connectivity.
Is ESP8266 better than ESP32?
The ESP32 is generally more capable, but that doesn't make it the better choice for every project. For straightforward Wi-Fi-based projects where you don't need the additional capabilities of ESP32, ESP8266 can be a practical and cost-effective option.
Where can I buy a NodeMCU ESP8266 WiFi Development Board?
You can check Component Wala for the NodeMCU ESP8266 WiFi Development Board along with other electronic components for IoT, Arduino, robotics, and DIY projects.
Related products
Components that pair well with this guide.